Hi, this is the CameraFi Live team.
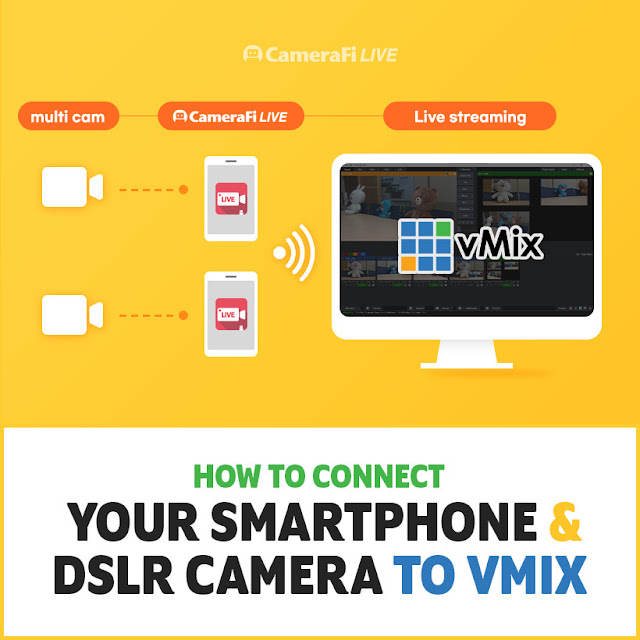
Did you know that you can connect multiple cameras to vMix using only an Android phone? vMix is a software widely used for real-time streaming.
Today, we will show you how to transmit videos from your cameras quickly and stably in a wireless environment.

✔ Things to Prepare
- Android smartphone with CameraFi Live app installed
- Desktop PC or laptop for broadcasting
✔ Index
- 1. Install vMix.
- 2. Check your IP address.
- 3. Prepare in vMix.
- 4. Connect CameraFi Live with vMix.
- 5. Record & Broadcast
- 6. Stream to vMix with a Camcorder(or DLSR) x CameraFi Live.
- 7. Connect vMix and Zoom.
* You can click each step's link to access a shortcut
✔ Notice
- The PC and smartphone MUST be connected to the same router. (If your smartphone and PC are not on the same network, please refer to Chapter 6. on the post HERE).
If you are ready to start, please read the first step!
1. Install vMix.
vMix is a software for video recording and real-time broadcasting.
- Download: https://www.vmix.com/software/download.aspx


2. Check your IP address.
To be able to use the feature, you need to check your IP address.
1) Click the Windows logo on the left bottom and select the Settings menu.

2) Click Network & Internet.

3) Select Wi-Fi or Ethernet in the left-hand menu, depending on whether you are connected wirelessly or via an ethernet cable.

4) Select Network in the center column. Your IP address appears in the entry IPv4 address on the next page.

3. Prepare in vMix.
Let's go to vMix and set it up!
1) Open vMix and click the Add Input button.
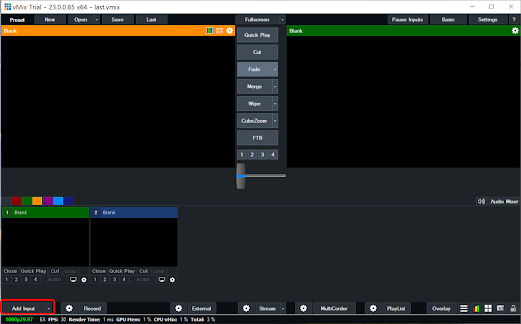
2) Click the Stream/SRT menu, set the Stream Type as SRT (Listener), and Port number. Then, click the OK button.

3) Finally, you can see that the SRT screen is created like the picture below;
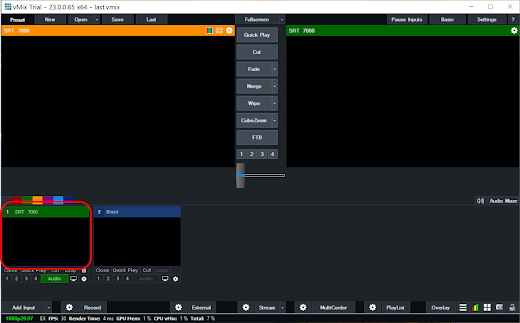
Now, vMix is ready!
4. Connect CameraFi Live with vMix.
This next step will go through the process of connecting a PC with CameraFi Live.
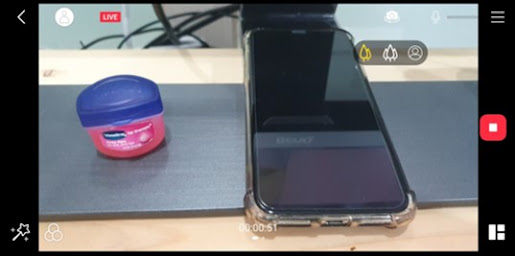
1) Open CameraFi Live and click the vMix option.
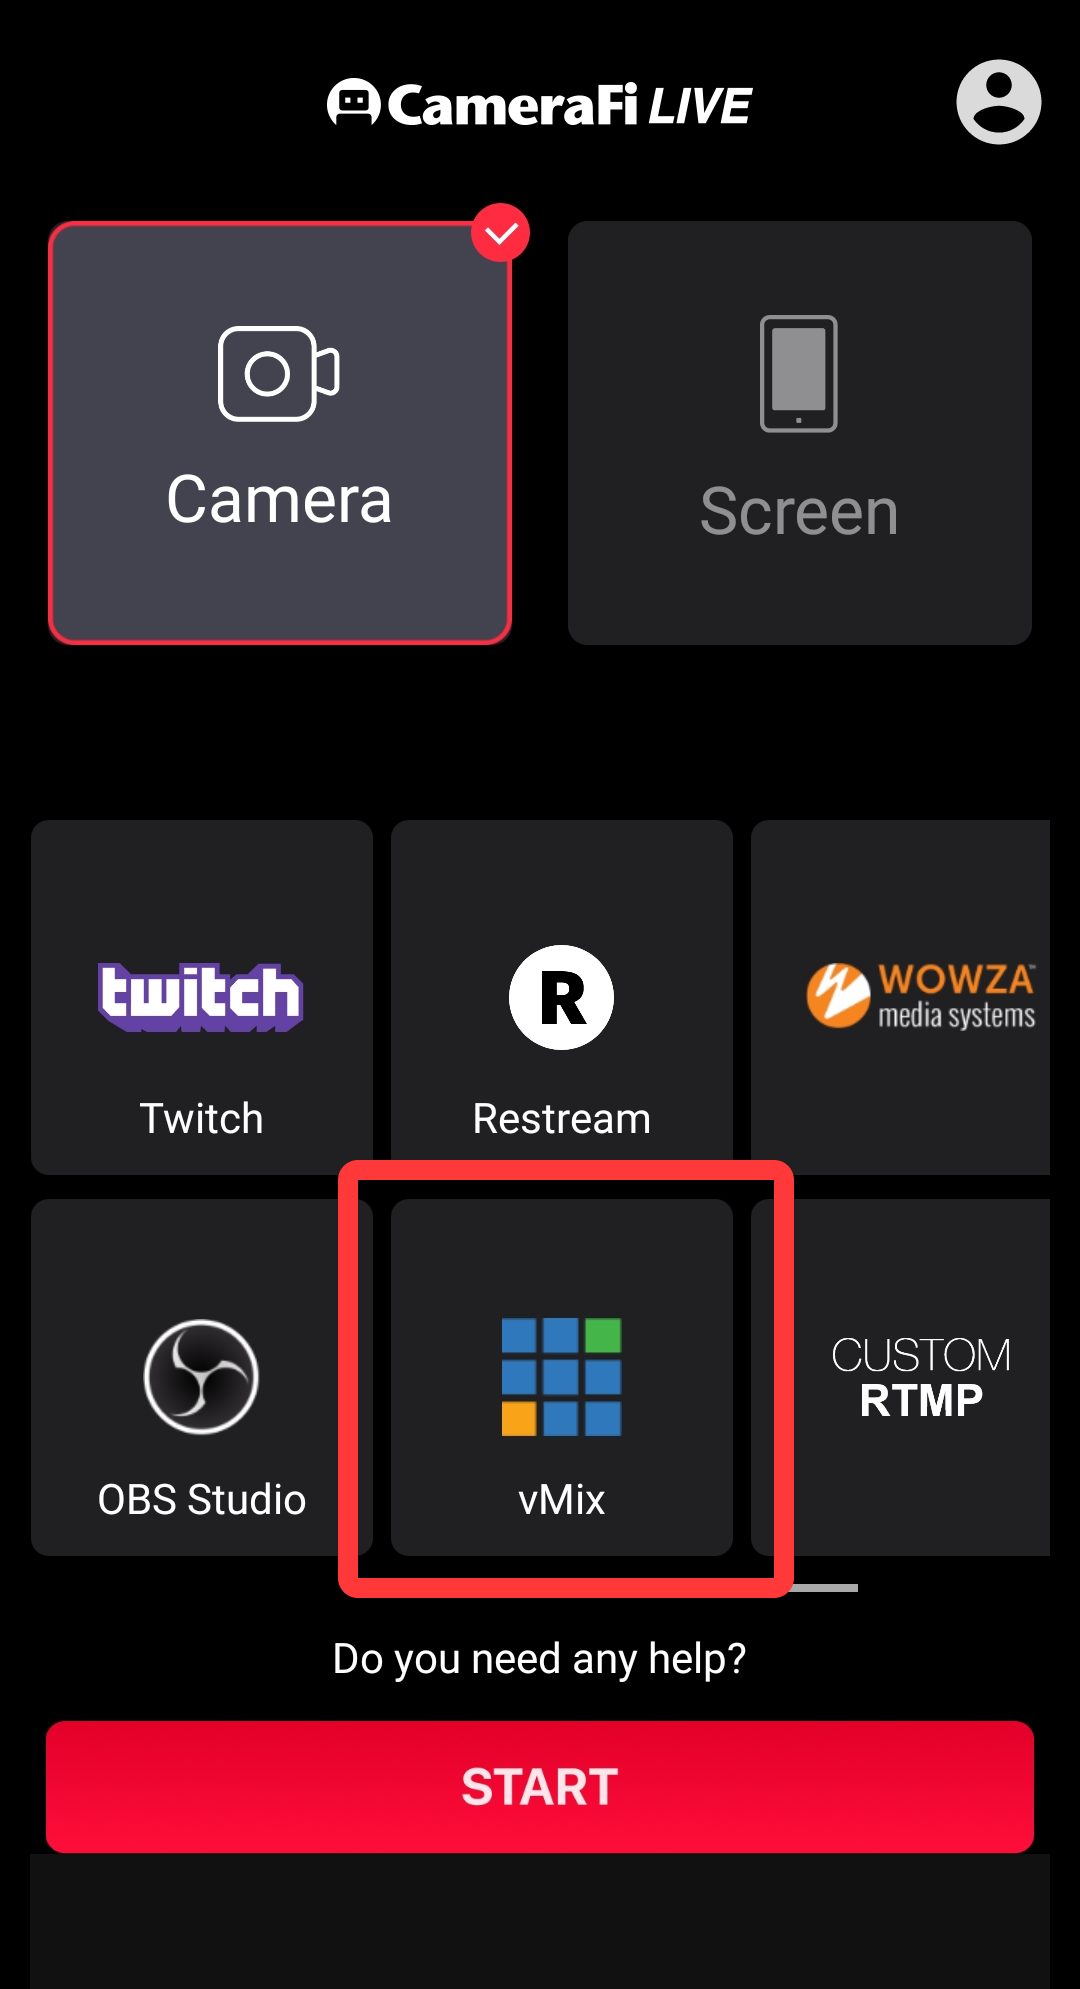
2) Write the IP address and port number and click the START button at the bottom.


If you need higher quality in your video, you can use the HEVC option?
1) Go to the Settings menu and click the Encoder Format.
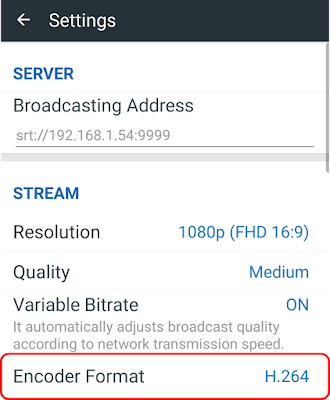

✔ Caution: Some PCs cannot support the HEVC video transmission depending on their specifications.
5. Record & Broadcast
You can start the recording or broadcasting on vMix.
[Recording]
1) Click the Record button.


[Broadcasting]
1) Press the gear button next to the Stream option.

2) Select the Destination and write the Stream Key. Next, click the Save and Close button.

3) After the settings, you can see that it will be transmitted to the corresponding destination.

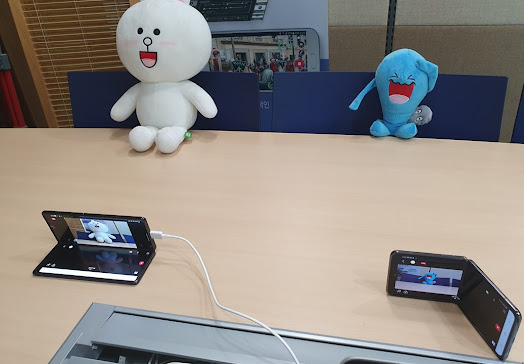
6. Stream to vMix with a Camcorder(or DSLR) x CameraFi Live.
From Steps 1 to 5, we learned how to send the video from CameraFi Live to vMix.
In this chapter we will learn how to stream the videos of two smartphones and a smartphone with a camcorder (or the DSLR) connected via vMix.
1) Install two smartphones as shown below.
Please refer to the video link below for how to connect your camcorder.
- https://youtu.be/LpvvCONg0CQ

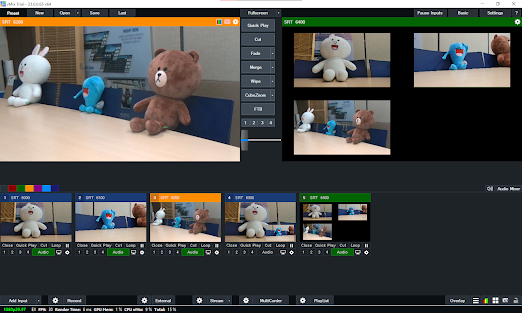
3) Add the scenes from vMix and start the video streaming.
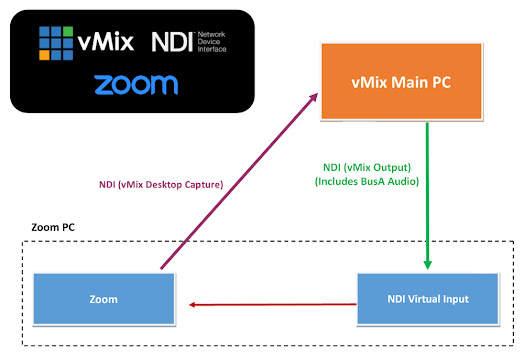
7. Connect vMix and Zoom
Due to an increasement in remote work, video conferencing through Zoom is also rapidly becoming prevalent these days. You can connect to vMix with CameraFi Live and send the video to Zoom.
The vMix website introduces 1) how to connect vMix and Zoom to broadcast showing the Zoom participants, and 2) how to send the video from vMix to the Zoom users.
- https://www.vmix.com/knowledgebase/article.aspx/170/adding-zoom-calls-to-vmix-with-return-video-and-audio
If you have any additional questions, please feel free to leave a comment below.
Thank you.