Hi, this is the CameraFi Live team!
When you encounter issues with live streaming on a Facebook Page, there are two solutions available.
In this post, we will explain the troubleshooting steps to address problems that may arise during live streaming on a Facebook Page.
New Streaming Requirements:
- Profile Age: Your profile must be at least 60 days old to be eligible for live streaming.
- Follower Count: You must have at least 100 followers to stream live. This applies to both personal profiles in professional mode and Facebook Pages.
These updates are meant to maintain and ensure the quality of streaming on the Facebook platform. Attempting to stream without meeting these requirements may result in restrictions, so we advise you to prepare accordingly.
<Case 1> Q. Can’t stream live on Facebook?
A. Grant Access Permission from Facebook Page Admin
=> If you want to broadcast live on Facebook Page, you have to create your own page or grant Access Permission from Page Admin.
(Page Admin can give access to others.)
We will explain the process for page administrators to grant access permissions in the following steps:
1. How to Add Someone as an Administrator to Your Page
1-1. Using a Web Browser
1-2. Using a Facebook Mobile App
2. Accepting the Invitation
3. Change Access Level / Remove Access
1. How to Add Someone as an Administrator to Your Page
1-1. Using a Web Browser
1) Click the ‘Pages’ menu which is on the left side of your screen.
If you can’t find the Pages menu, click ‘See more’ and you can find more menus.

2) You can see the ‘Pages You Manage’ on the left side of the screen. Select the page you want.
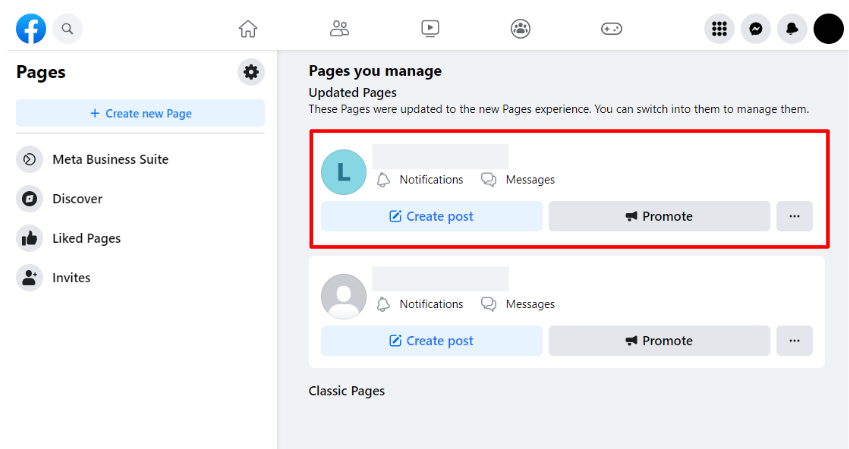
3) Click ‘Switch Now’ that appears on the right side of the screen.
As the account switches, you’ll be able to access the Settings.
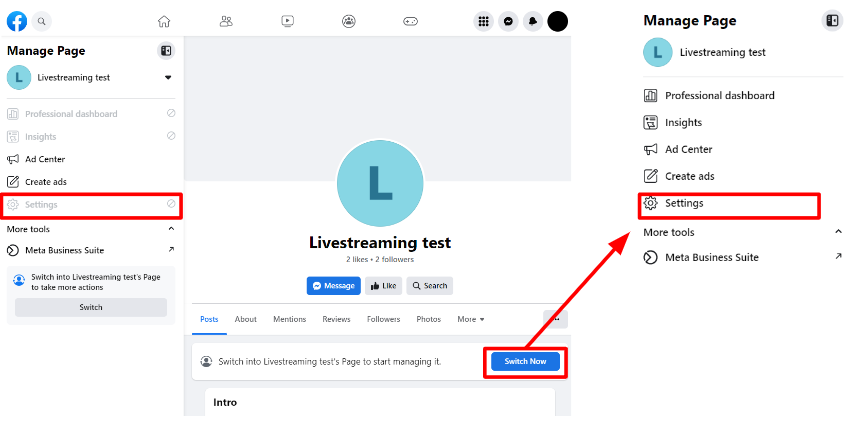
4) Click the Settings -> New Pages Experience.
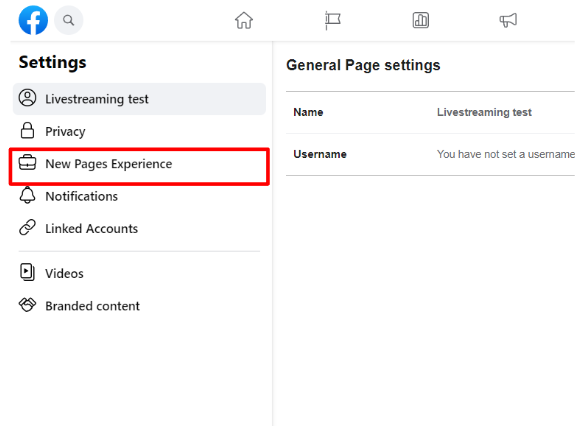
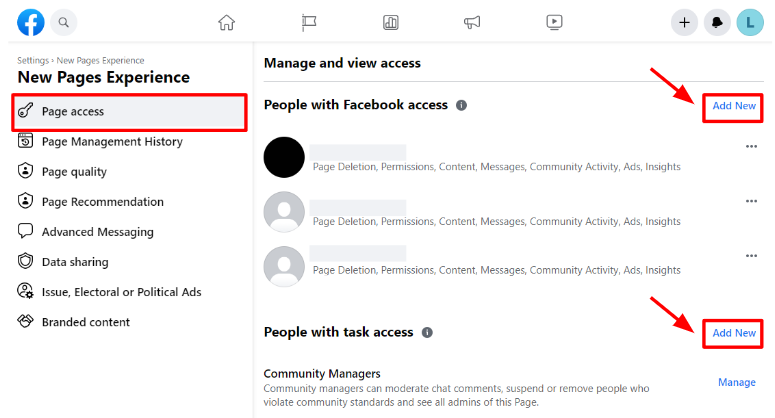
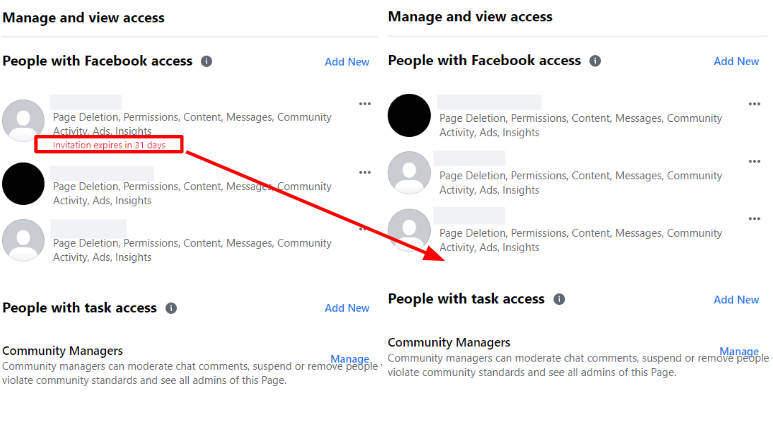
5) Go to the ‘Page access’ menu, and select “Add New” next to the desired administrator type.
- People with Facebook access : This type of access is for the page operator and can change the account to the Page account for management.
- People with task access : This type of access is for the partial administrator and doesn’t have all authorities in the page, but can manage specific tasks.
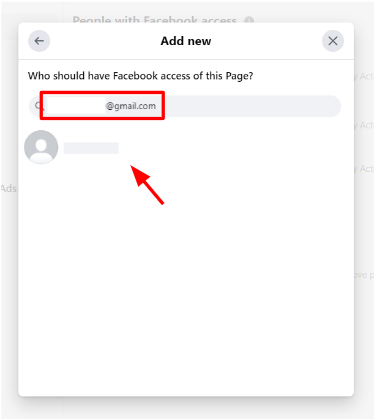
6) Click “Next”, search and select the person you want to add by entering their email or name in the search bar.
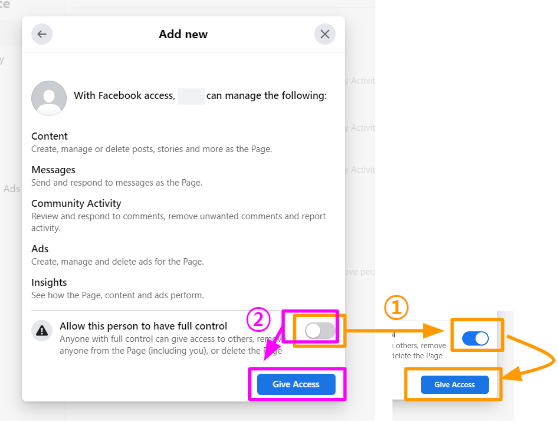
7) ① To allow others to access and delete pages, click the button next to the message
“Allow this person to have full control”, and then click ‘Give Access.’
② If not, choose ‘Give Access’ without selection.
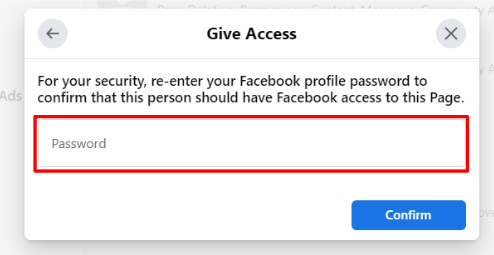
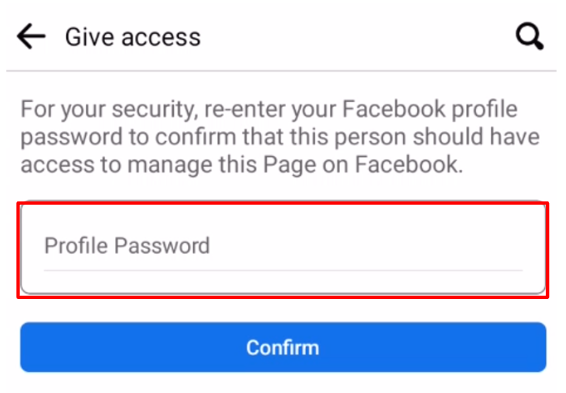
8) Enter your account password and click ‘Confirm.’
9) Right after you add the administrator, the change does not adjust right away. The person who is added has to accept the invitation. After the person accepts the invitation, the red message ‘Invitation expires in 31 days’ disappears and the addition of the administrator is finished.
1-2. Using Facebook Mobile App
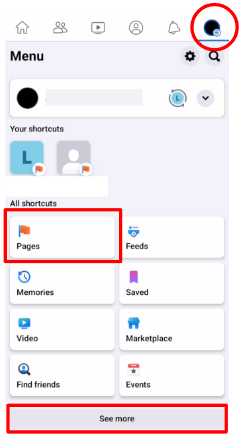
1) Go to the ‘Menu’ which is on the top-right corner of the screen and find the ‘Pages.’
If you can’t find the ‘Pages,’ click ‘See more’ and you can see more menus.
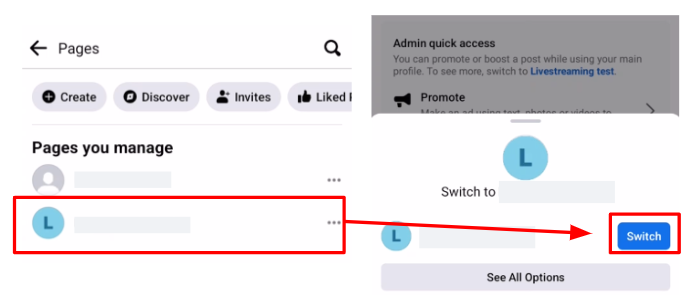
2) After selecting the page you want, click ‘Switch.’
3) Go again to the ‘Menu’ and select the ‘Settings.’
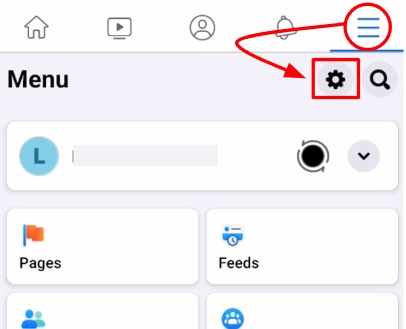
4) Select ‘Page settings.’
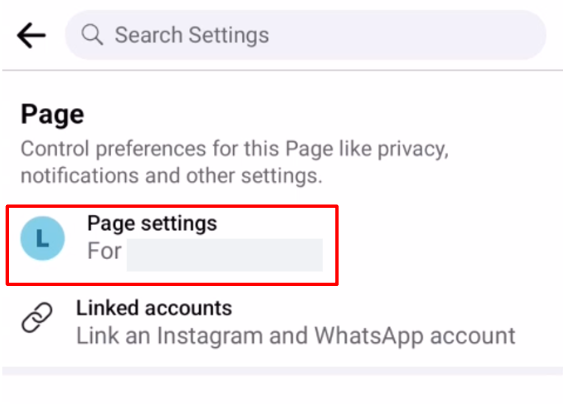
5) Scroll down the page until you see ‘New Pages experiences.’ Select ‘Page access.’

6) (From here, processes are the same as 1-1. Using a Web Browser 5) to 9).)
Go to the ‘Page access’ menu, and select ‘Add New’ next to the desired administrator type.
- People with Facebook access : This type of access is for the page operator and can change the account to the Page account for management.
- People with task access : This type of access is for the partial administrator and doesn’t have all authorities in the page, but can manage specific tasks.

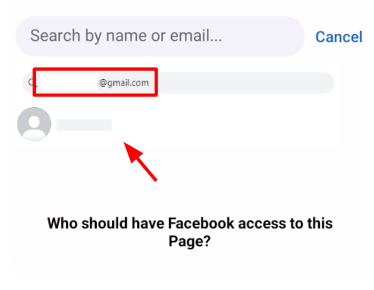
7) Click ‘Next’, search and select the person you want to add by entering their email or name in the search bar.
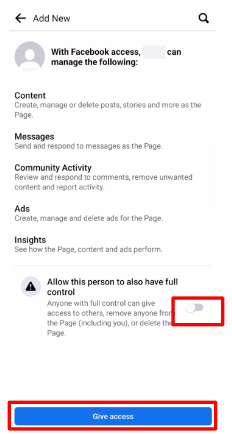
8) ① To allow others to access and delete pages, click the button next to the message
“Allow this person to have full control”, and then click ‘Give Access.’
②If not, choose ‘Give Access’ without selection.
9) Enter your account password and click ‘Confirm.’
2. Accepting the Invitation
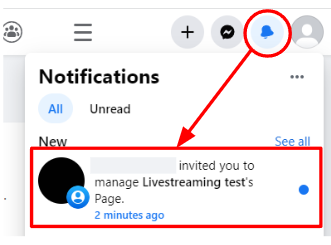
1) Click the’ Notification icon’ and select invitation notification.
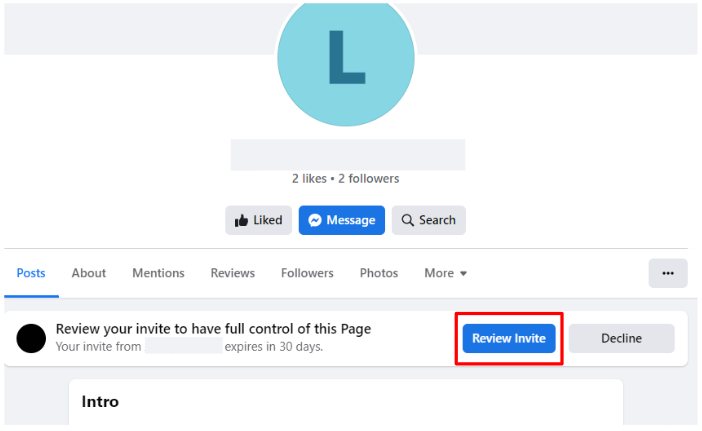
2) Click the ‘Review Invite’ on the main page of the invited page.
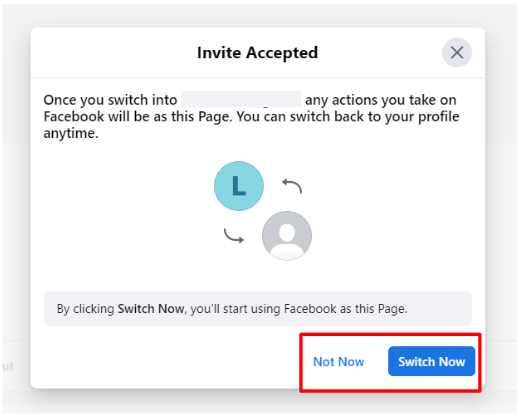
3) Click Next -> Accept, and if you plan to use the page immediately, select “Switch Now.”
If you intend to keep using your current account, choose “Not Now.”
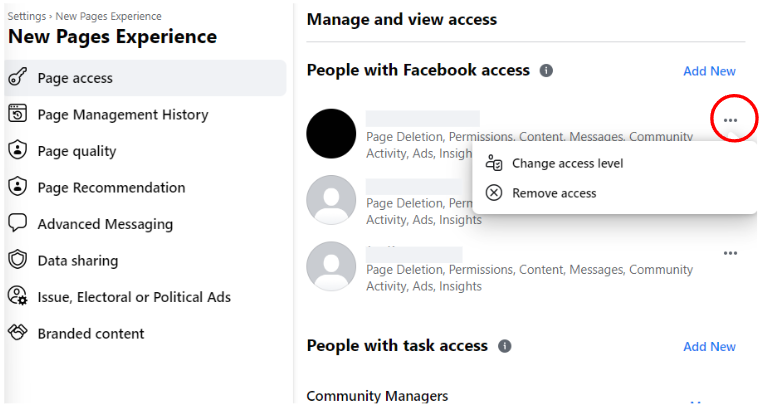
3. Change Access Level/Remove access
1) Go to the Pages -> Settings -> New Pages Experience -> Page access.
Click an ellipsis icon next to the account you want to change or remove access.
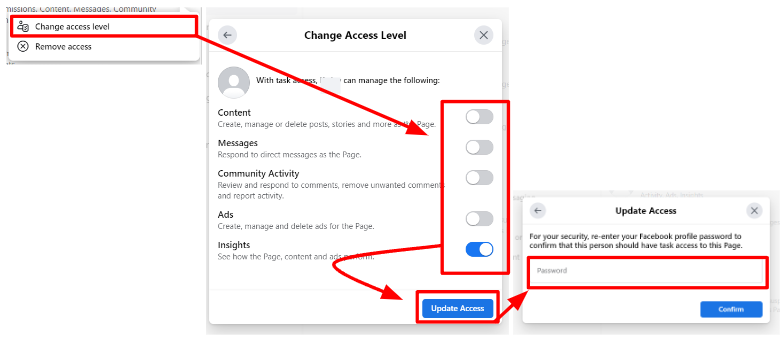
2) Change Access Level : You can allow administrators to select and give permissions to manage items. Select the button next to the item you want to allow, then select Update Access. Enter your account password and click Confirm to complete the access level change.
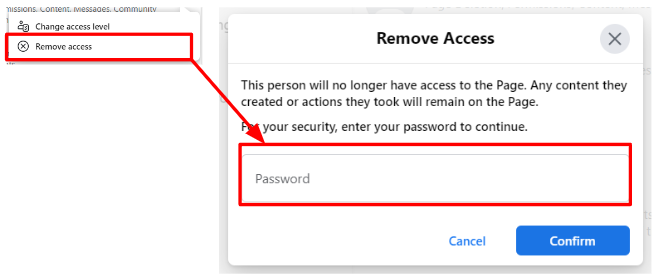
3) Remove Access : Click ‘Remove Access,’ enter the password and select ‘Confirm’.
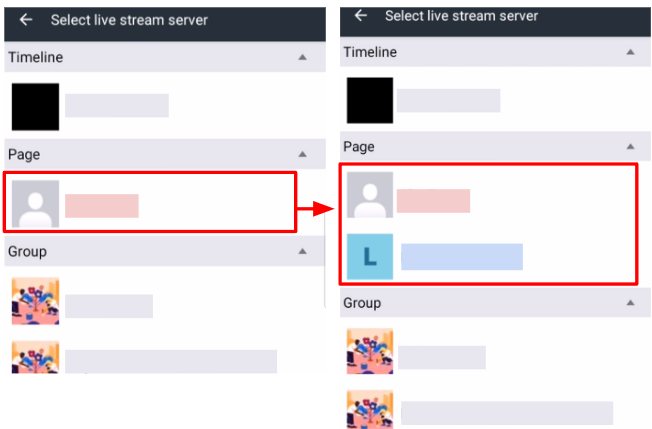
<Case 2> Q. Can’t see the Page you want to broadcast in the CameraFi Live app?
A. Additional Page permissions needed
=> An issue sometimes happens when you have access to more than one page, but the page you want to broadcast is not visible in the CameraFi Live app.
<CameraFi Live App> <Facebook Mobile App>
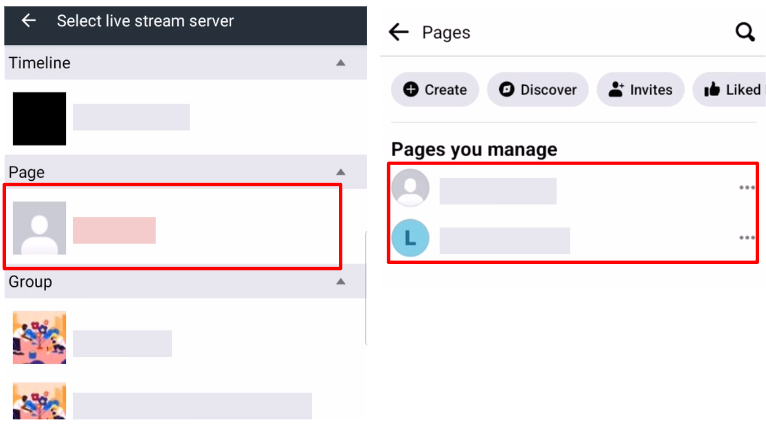
In this case, you need additional page permissions on Facebook.
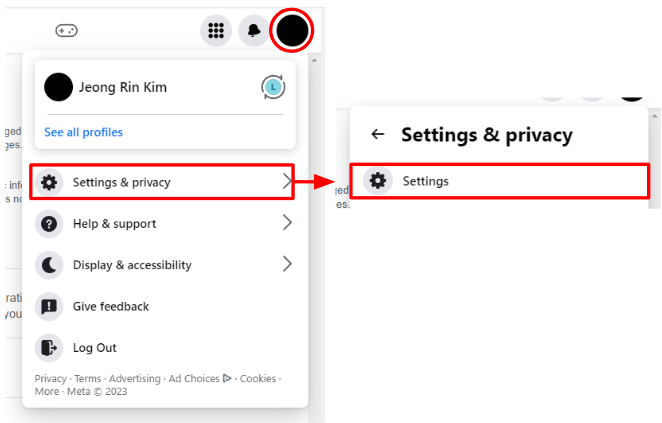
1) After accessing Facebook, select Profile Image -> Settings & Privacy -> Settings.
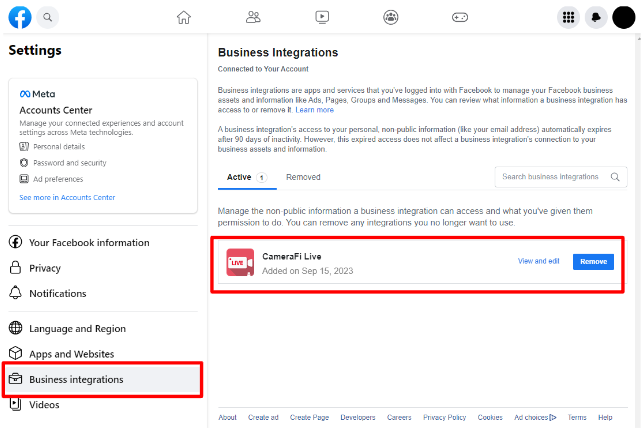
2) Select ‘Business integrations’ on the under-left part of the screen.
If you have ever connected Facebook to your streaming channel in the CameraFi Live app, you will see the CameraFi Live app on the right.
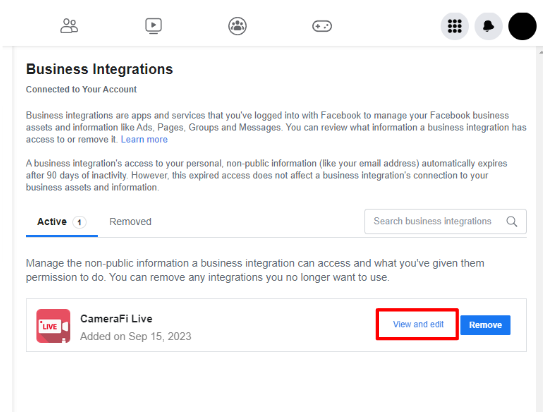
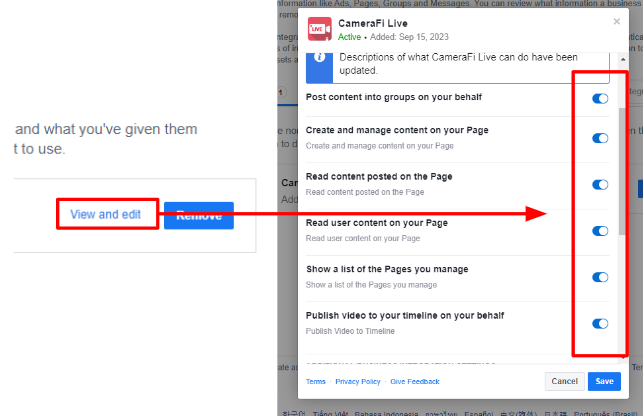
3) Select ‘View and edit.’
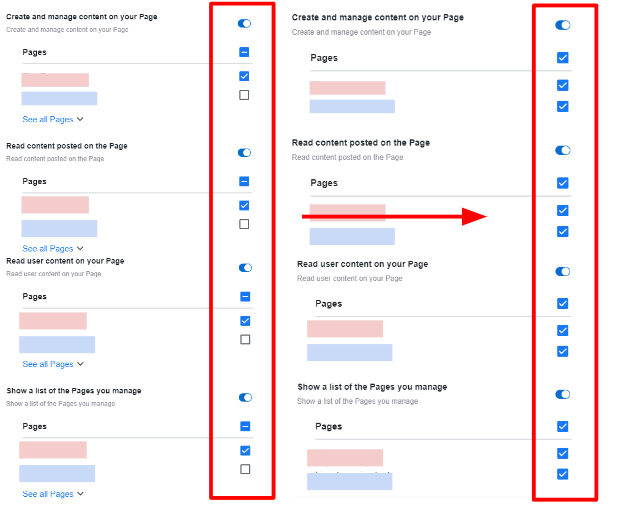
4) As you scroll down the page, you will see that only one of the pages has a checkbox selected.
Please select all the empty checkboxes.
Once all checkboxes are selected, press ‘Save’ to save the changes.
5) To confirm, please select “View and edit” again.
If all pages you manage have been granted permission, you will not see the checkbox.
6) Now go to the CameraFi Live app, disconnect your live stream server, and connect Facebook again. You can now see all the pages.
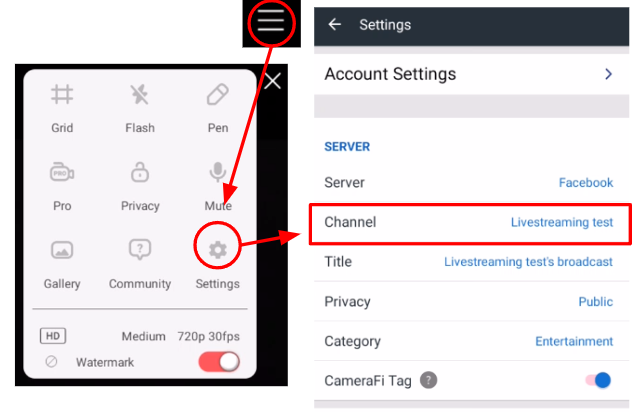
7) If you want to change your page after you connect Facebook, go to the Main Screen -> Menu -> Settings -> Channel.